2020.11.23
The headline of this release is Dynamic Control 2.0
- CHANGED Dynamic Control Removed fuss and simplified the interface.
- CHANGED "Delete All Physics" Now deletes all physics, regardless of the current selection
- CHANGED Rigid versus Collider Learn about what these mean and how to convert between the two.
- ADDED Center of mass (Advanced) Now you can change the point at which a rigid body is balanced
- ADDED Angular mass (Advanced) Typically computed automatically from the shape and size of your rigid, now you can manually define this.
- ADDED Auto Connect More clarity, and also usable with things other than joints
Dynamic Control 2.0
Ragdoll is currently very technical.
It is exposing features of an underlying mathematical framework for solving "Rigid-Body Dynamics" (wiki) and tries to be as friendly about it as possible, but there is always a tradeoff in usability and flexibility.
Dynamic Control was made to bridge that gap.


It combines a user-selection with a series of commands to automatically try and figure out your intentions when those intentions are "add some dynamics to my animation control".
Dynamic Control has been with Ragdoll for a few weeks now, and have undergone a series of changes to try and increase its intuitiveness whilst reducing complexity. It's hard! But in this release I'd like to present what I'm dubbing the "2.0" of Dynamic Control.
The main differences are:
- Preserves existing animation rather than replacing it
- Simulation follows animation with additional "stiffness" and "damping" attributes
stiffness is the "springiness" whereas damping is the "plasticity". A control can have 0 damping and be very springy and active. It can also have 0 stiffness, but that would basically disable it.
On a technical note, the attributes exposed on your animation control are "proxy" attributes. Which means they can be animated either from your control, or from the source node, such as the
rSocketConstraintshape node under your control.

Here are some more videos to get you familiar with the tool.


Limitations
Some limitations in this current version, yell if these affect you.
- Negative scale not allowed, the tool will refuse your request
- Rotate and scale pivots are zeroed out
The same goes for all things Ragdoll at the moment.
Center of Mass
If you try and balance something on your finger, but the "center of mass" is off center, it would fall over.

It is the point at which the weight of an object is equal in all directions.
Ragdoll automatically computes this point based on what the shape looks like. For meshes, it will voxelise your geometry to figure out the physically accurate volumetric center of mass, assuming the density of the object is uniform throughout (rather than hollow or variadic, like swiss cheese).
You can now override this point using rdRigid.centerOfMass.
Guidelines
- For realistic results, leave it at
0to compute the point automatically based on the shape - For full control, override it
Angular Mass
In real life, if you spin a broom 180 degrees along its length; that's easy. But if you spin it 180 degrees along any other axis, like a ninja, it's considerably heavier.
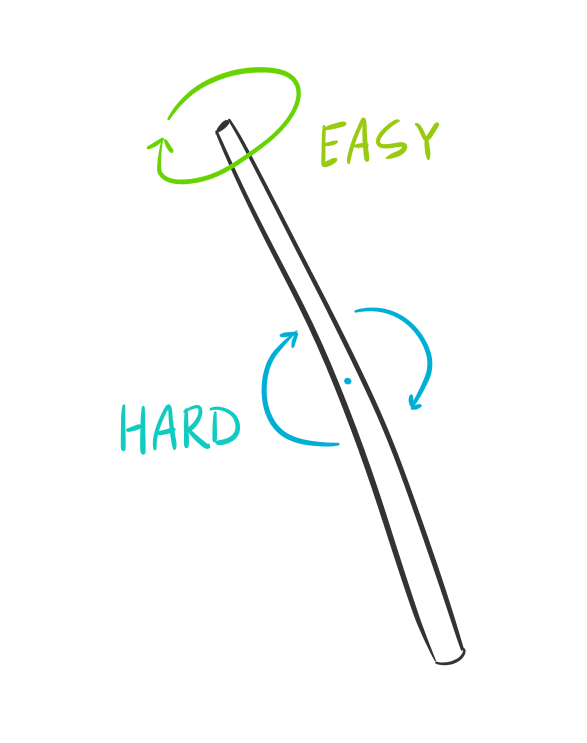
The reason is something called "angular mass", also known as "moment of inertia". It's like mass, but in terms of rotation rather than position. The broom has a low angular mass along its length axis. It takes more force to affect a "heavier" axis than a lighter one which is why a broom spins more easily along its length.
This effect happens in Ragdoll too and is typically automatically computed for you based on the shape you use. If it looks like the broom, it will act like a broom.
With this release, you can now customise this for greater control of your rotations.

When would you want to do that?
- Your shape looks like a broom, but you want it to act like a box
- Your shape doesn't look like a broom, but you would like it to act like one
Or any combination in between. :) Generally, a broom or any thin shape is more easily spun along its length, so you may find stability in setting your angular mass to (1.0, 1.0, 1.0), at the expense of realism.
Guidelines
- For realistic results, leave it at
-1to automatically compute the angular mass - For full control, override it
Auto Connect
The "Auto Connect" option now enables you to specify whether to connect joints, or any selected object.
