Ragdoll 4.0 Beta
Highlight for this release is 1 year of development!
- ADDED User Interface Revamped and superpowered
- ADDED Standalone Freed from the chains of Maya and Blender
- ADDED Rendering 2.0 New continuous renderer with raytraced shadows
- ADDED Solverless Simulation Procedural Ragdoll
- ADDED Ragdoll for Motion Builder One more platform to support!
- ADDED Ragdoll for MacOS ARM ARM and x86 alike
- ADDED Center of Mass Visualise the point of balance for a character
- ADDED Soft Contacts Squishy humans and more
- ADDED Direct Output Bypass the need to record, with a trade-off
- ADDED Cluster Simulation of objects in bulk
- ADDED Tapered Capsules An alternative to polygons
- ADDED Impulse Visualisation Gain better understanding of forces
- FIXED Custom Maya DPI Scale Ragdoll's option UI now scales properly
- FIXED Quality of Life Life, but better!
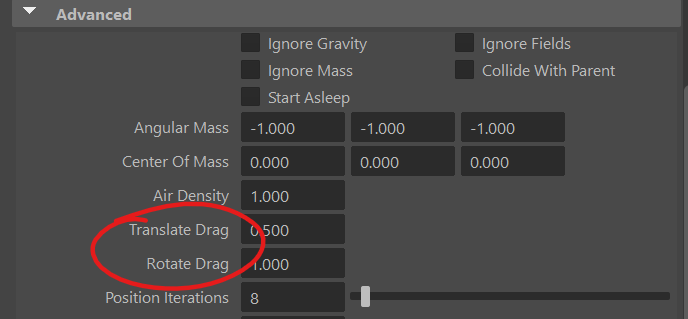
- CHANGED Translate & Rotate Drag Slow down
Overview
So where have we been this whole time?!
Well, we've been ripping out parts of Ragdoll from Blender and Maya to give way to a new contender; one that is entirely independent of Maya or Blender, or any software altogether.
Our very own Ragdoll Standalone!
Standalone
One of the main challenges with Ragdoll is Maya. In order to use it, you first need to own and learn Maya. That's quite the barrier to entry!
With Ragdoll Standalone, we would like to enable animators access to an alternative set of animation tools; one with focus on ease of use and realistic performances.
- Posing should feel like posing an action figure in your hands.
- Animating should feel like putting a puppet on your hands and dancing it around.
Not only that.
- Modeling should feel like drawing a stick figure
- Rigging should feel inserting an armature into a clay figure
- Rendering should feel like whipping out your camera and hitting Record
To complement the rise of new AI tools, Ragdoll will require thought and effort. Like a violin versus a jukebox.
- The Jukebox can produce a complete song at the push of a button. With an infinite library anything is possible, requiring nothing more than sitting back and making choices. But your sense of ownership and accomplishment is low. Low effort, low reward.
- The Violin requires practice and determination, but absolutely nothing goes to waste. Every minute you put in is a minute you get out. High effort, high reward.
We expect Ragdoll to sharpen the minds of humanity, to provide a strong correlation between vision and output. Something to complement the lessening need to think in this increasingly automated world.
Methodology
Picture a professional pianist on stage, performing in front of a live audience. Think of the bits per second travelling from head to fingertips. It is immense! Not only hitting the right note, but at the right time, at the right pressure. Precision and composition happening before your eyes, with years of hard-earned practice behind it.
Ragdoll Standalone is designed for a slightly different kind of animation than Maya - live animation. In other words: interactive animation, produced by you in real-time.
You could use your mouse and keyboard, sure. But more likely you'll use alternative hardware such as the multi-touch surface of your phone or Wacom tablet, a Leap Motion controller, a Playstation/XBox Control and/or MIDI equipment. Whatever you need to transfer your vision into animation as efficiently as possible.
User Interface
The UI has seen a complete overhaul to facilitate the new Ragdoll Standalone, wherein Ragdoll can be used by anyone not familiar with Maya or Blender.
Outliner
Much like in Maya and Blender, you can navigate the Ragdoll scene using its own Outliner panel.
Roadmap
There's a lack of multiple-selection, searching for things and general usefulness you've come to expect from the likes of Maya's Outliner.
Properties
Navigate individual properties on each type of object in Ragdoll using the Properties panel.
Alt + Dragto scroll- Use right-hand scrollbar to scroll
- Expand general sections for specific properties
Double-clickon value to edit value via keyboardClick + Dragto manipulate value- Undo/redo works as you'd expect in both as Standalone and plug-in
Roadmap
Scrolling is a little finicky still and values only update upon releasing the mouse and applying the value.
Script Editor
Press backtick to bring up the Script Editor.
Ctrl + Returnto execute and clear
MacOS Universal Binary
Ragdoll is (finally) able to run natively on ARM processors, meaning any of the recent M-class computers - M1, M2, M3 and M4.
Balancer
A new solver has been added that lets characters preserve balance as they try and reach the poses you give it.
Roadmap
The Maya attributes are complex and will be heavily consolidated. The workflow is also a little awkward, especially for anything moving its feet. You will also be able to use this for a solver in Live Mode and as a layer in Performance Mode, to automatically balance the keyframes/notes you set.
Usage
It's a new solver type, in addition to the normal rigid body types Stable and Strong called Balancer. It will attempt to retain balance, given the new End Effector type. Which is identical in concept to a Pin Constraint, with some extra parameters. Primarily the type of constraint.
Offit won't be followedPositionit will attempt to reach the position of the end effectorContact Pointit will consider the Marker as being in contact, typically crab feet whilst they are on the groundContact Arealikewise, except with 4 points used to form a surface
The solver will attempt to find a pose whereby the center of mass is above the contact. It will also work in Live Mode, although watch out, crashes may happen.
We'll use this for two purposes.
- During Live Mode, to pose the character whilst maintaining a balanced pose. Kind of like trying to pose your friend in real life, whilst asking them to stand still (and not fall over)
- Visualise a "correct" pose during normal, kinematic animation
(2) is upcoming, for now you can play around with it and see where it breaks and how it acts. 
Solverless Simulation
Select Off for your solver to benefit from the procedural capabilities of Ragdoll. Today it doesn't do much other than display the inner keyframes you set, and the center of mass.
Roadmap
This is how Ragdoll will be able to put glasses on every animator; visualising the center of mass, its trajectory and rotation inertia. It will make realistic choices obvious and unrealistic results hard.
There's not much you can do with this today, but here's something small.
- Enter Manipulator
- Enter Live Mode
- Pose the character
- Ctrl + V to set a (Ragdoll) keyframe
- Move to a different time
- Repeat 3-4
Now when you are in solverless simulation, no simulation takes place, only the (Ragdoll) keyframes you have set. Not terrible impressive  but this is what foundations look like.
Center of Mass
More on this in a moment!
Motion Builder
The newest member to the family, beta coming up.
Soft Contacts
Contacts can now be soft, like in reality. Meaning you can now do things like this!
The difference is subtle but significant, have a look at this.
Hard Contacts
Soft Contacts
Why?
No contact is 100% hard. Even if it's diamond-to-diamond, materials flex and give way to one another. But rigid body solvers traditionally treat contacts as if they were, resulting in a wooden puppet-type of look.
This has 2 major advantages.
- Simulate soft objects, like humans and tires
- Enable overlapping objects, like biceps pushing against torso
Soft Animation
Both stiffness and damping can be animated!
They behave mostly like what you already use for Pin Constraint and Markers in general, with one major difference; the softness is between two Markers, each with its own stiffness and damping.
Which should it choose? Stiffnesses are multiplied, per default.
Advanced Mixing
We expect the default should suit most needs, but if you find yourself adventurous, try some of the alterative Contact Combine Mode values.
- Average
- Min
- Max
- Multiply
Each do what you would expect; an average means that if one Marker has a stiffness of 1.0 and another with 9.0, then their average will be
(1.0 + 9.0) / 2.0 = 5.0
Soft Globals
At the solver level, you have control over the overall contact stiffness of all Markers in the scene, accessible via rSolver.contactStiffness and rSolver.contactDamping. Like you would expect from limits, constraints and Markers too.
Unlike Markers however, the "damping" values are not a ratio but a final value, multiplied onto the whole.
damping = marker.stiffness * marker.dampingRatio * solver.damping
Z-Ray
Fry: Uh, what is this? Seller: Arh, it is x-ray eye. See through anything Fry: Wait a minute. This says "Z-ray" Seller: "Z" is just as good. In fact, is better. It's two more than "X" Fry: Hmm, I can see where that could be in advantage. Do you take cash?
It's from Futurama. :)
Entering Wireframe now gets you an enhanced view of the underlying mechanics of your simulation.
The especially interesting ones are the ones happening between objects of the same character.
Examples
Previous hard contacts
Notice how they appear as though diamond landing on diamond. No softness at all. Very unnatural.
Some softness
Add some stiffness, and they'll behave more like boxes falling onto grass.
Some springiness
Or a jumping mat, why not.
Lots of springiness, and little springiness
Crank things up, and they can appear as though they fall onto a very springy mat, or a soft cushy mattress.
Lots and lots of springiness
Tapered Capsules
More control over shapes, without resorting to polygonal meshes.
Roadmap
This is what will soon power the Ragdoll modelling tools
Direct Output
You can now have Ragdoll control the Translate/Rotate channels directly, without Record Simulation.
Here's how it works.
- The simulation is output onto a new set of
jointnodes - The connection between
controlandMarkeris cut - The
controlis constrained to the newjoint
The advantage being that you can tweak the environment, any physics settings like gravity and substeps, and see the result on your character immediately. Useful for things like hair or props that do not need to follow their original animation.
Because that's the limitation; once the control is constrained to the simulation, you can no longer interact with the control. Ragdoll's the captain now.
Workflow Example
Here's an example of simulation without the typical Markers being visible.
1. Make Direct Output
2. Make Meshes
We can re-use the meshes Ragdoll knows internally for the new rig.
3. Reparent Meshes
And use them as shapes for the new rig
Evaluation Engine
Performance boosts, multi-threading and room for future expansion, more on this later.
Rendering 2.0
The rendering pipeline has been upgraded with some new bells and whistles!
- Continuos Rendering
- Smooth Shading
- Shadows
- Ambient Occlusion
Roadmap
More eye candy including motion blur and image-based lighting is coming up next.
Continuos Rendering
Part of the change in rendering architecture is updates now happening at 60 fps in the Maya, Blender and Motion Builder viewport, like they do in Ragdoll Standalone, independent of user input of host rendering.
History
In Maya, rendering has traditionally piggy-backed on the MPxManipulator triggering viewport updates on mouse input. When the mouse moved, the viewport was updated.
Future
With continuous rendering, we can now animate UI and provide more interactive feedback.
It's also what powers playback within Live Mode and Performance Mode, more on that later!
Smooth Shading
The smoothest normals since 1979.
Hard Shading
To revert back to the previous hard shading, try this.
import ragdollc as rd
host = rd.host.getInterface()
host.setBooleanOption("smoothShading", False)
Or navigate to the Preferences in the UI and look for the Smooth Shading option.
Shadows
Pixel-perfect ray-traced shadows. Should help make it easier to spot issues with your simulation.
Soft Shadows
Increase the light radius for shadow softness.
Roadmap
The resolution of the shadows are still low, resulting in the jitter you see. Higher resolution (i.e. greater performance) is up next.
Ambient Occlusion
Darkening in the crevices of your geometry make intersections and close contact pop, with this (screen-space) ambient occlusion.
Impulse Visualisation
Contacts now include the direction and magnitude of the force being applied, helping you understand how strong (or weak) forces are at specific locations.
Cluster
Simulate tens of thousands of pieces with ease.
It will simulate each individual polygon island of your mesh.
Roadmap
As a beta, this feature is incomplete. Here's where things are headed:
- v0.1 What you currently see
- v1.0 Procedural constraints, to dynamically connect pieces based on vertex/face proximity, face angle or external volume shape etc. To facilitate e.g. a building breaking from the impact of a wrecking ball
- v2.0 Joint hierarchy, for crowd-like ragdolls with little control and high-performance
Usage Maya
Meant for simulating lots of small pieces, with bulk control over all of them at once. Kind of like a lot of Markers in a single Group, except all Markers are bundled together as one "Cluster". They have much greater performance for cases where you need less control over many objects, like destruction, hair, feathers or scales.
Step 1 - Setup
Create a single mesh, with many polygon islands.
Step 2 - Assign Cluster
Assign a cluster to the mesh, each polygon island will move independently.
Step 3 - Assign twice
Instance the single mesh by assigning to it over and over, reusing the original mesh for each instance. This is how you can create big piles of stuff!
Step 4 - Modify geometry
Keep editing the original geometry to affect each instance.
Step 5 - Record
Recording is manual at the moment, here's how to do it.
from ragdoll.vendor import cmdx
from ragdoll import recording, commands

for cluster in cmdx.ls(type="rdCluster"):
    recording.record_cluster(cluster)
    commands.make_envelope(cluster)
Quality of Life
The little things.
Custom Maya DPI Scale
You can override the scale of your UI in Maya's global preferences.

Ragdoll wasn't aware of this, and used your display scaling directly. Now it is aware, and scales with Maya as you would expect!
Programmers
For the programmers out there, the trick is to query maya.MQtUtil.dpiScale, instead of going through native Qt, e.g. QWindow.QScreen().logicalDotsPerInch() / 96.0 since Maya overrides this value.
Translate and Rotate Drag
Previously called "Translate Damping" and "Rotate Damping", these attribute lets you block motion of an individual Marker, similar to the Air Density attribute on the Solver except applied to an individual Marker.
Record Translation on Individual Markers
Typically, Markers are assigned to a hierarchy of controls in a character rig, and thus translation is only relevant to the root control. But when assigning to a series of objects part of, say, a brick wall then you would expect all objects to have translation recorded as well.
That is now the case!
No Root Stiffness
Back in 2023.10.03, we introduced Use Root Stiffness such that the stiffness/damping values on any Marker would act as a Pin Constraint. A worldspace stiffness. But, as it happens, this was rather confusing and caused more issues than benefits, this has now been rolled back to a default of False.
You can still enable it, by calling cmds.setAttr("rMarker.useRootStiffness", True) or setting Use Root Stiffness amongst the Marker properties.
Known Issues
Since 2025.05.01, here's what we know.
Assign Characteris broken- User interface colors affected by Maya Color Management
- The Limit gizmos can appear too small or too large, depending on your character size
- The Center of Mass gizmo can also appear too small or too large
- The
Enabledattribute isn't always doing what it should - Saving and opening a file on a frame other than the start frame sometimes misbehaves