Full Ragdoll
Manikin Ragdoll
In the previous tutorial we assigned markers onto a rig such that you can achieve overlapping motion.
That's enough for some things, but other times you don't want any animation. You just want to drop a ragdoll someplace dangerous and watch it go.
Version 1.2 - Up to date
Written for Ragdoll 2023.08.01 and above.
Estimated Time
- 🕐 10 minutes
You will learn
- ✔️ How to prevent unrealistic poses
- ✔️ How to author and tune "limits"
Where to find help
If you find or run into any issues with these tutorials, here's what you can do.
- ✔️ Ask in the chat
- ✔️ Ask on the forums
Bring Your Own Rig
Either continue from the last tutorial or start anew with your own rig.
Limits
Next let's see how our character behaves when there isn't any animation around to steer it.
- Select
hip_ctl_rGroup - Set
Rotate Stiffness = 0.0
As in our last tutorial when we changed the hip_ctl from Animated to Simulated, now we do the same but for the whole character!
Yikes! That's a mess. No longer is the animation holding a pose together, it's all up to gravity and the anatomy of our character now.
The way we will address this is via "limits", which is like locked rotate channels except they also lock a range of values. We can use this to replicate natural limits in our human joints.
Legs
Let's start at legs and work our way up. First, let's figure out what axis we want to rotate, and which we want to lock.
Ok, great. The Z axis should rotate but X and Y should be locked.
- Run
Ragdoll -> Manipulator - Select the lower leg
- Switch to
Limit Mode - Enable limits around
X,YandZ - Lock
XandY
Next, tune the minimum and maximum values of the limit.
Tune Minimum and Maximum Separately
By holding the Ctrl key, you can manipulate one bound at a time.
Then we can do the same for the feet.
Something like that should do the trick.
Clavicles
Let's keep the clavicles simple. We'll allow only 1 axis of rotation by locking the others.
- Run
Ragdoll -> Manipulator - Edit the clavicle
Arms
We'll lock the X and Y axes of the lower arm like we did for the lower leg.
- Run
Ragdoll -> Manipulator - Edit the lower arm
- Edit the hand
Hip and Spine
Both the hip and spine should be allowed to rotate around all three axes, so we can leave these at their default values for now.
- Run
Ragdoll -> Manipulator - Edit the hip and spine
And that's it! From here, we can hide the limits to have another look at contacts.
Contacts
If we hide away our limits for a moment, we can see something that's not right. Notice how the arms and legs intersecting each other? That's because, per default, limbs within a single group are allowed to overlap.
Should I enable Self Collision?
Normally the answer is "no", but when you do, this can be overridden on the rGroup node.

Overlap Group
Let's address this by having these overlap with Nothing.
Finalise
You now know enough to construct any character of any anatomy!
You have learnt
- ✔️ How to limit the motion between two limbs
- ✔️ How to tune the minimum and maximum bound of each limit
As you tune, try dropping the Manikin from different heights and angles. Put an obstacle underneath for more detail and to catch more edge cases. Once you are unable to produce an unnatural pose, you are done!
Download Completed Scene
For your reference, here is the completed scene with the Manikin file referenced.
Damped Limits
You can tune the behaviour of each limit to capture the look you're after, such as making things a little more damped.
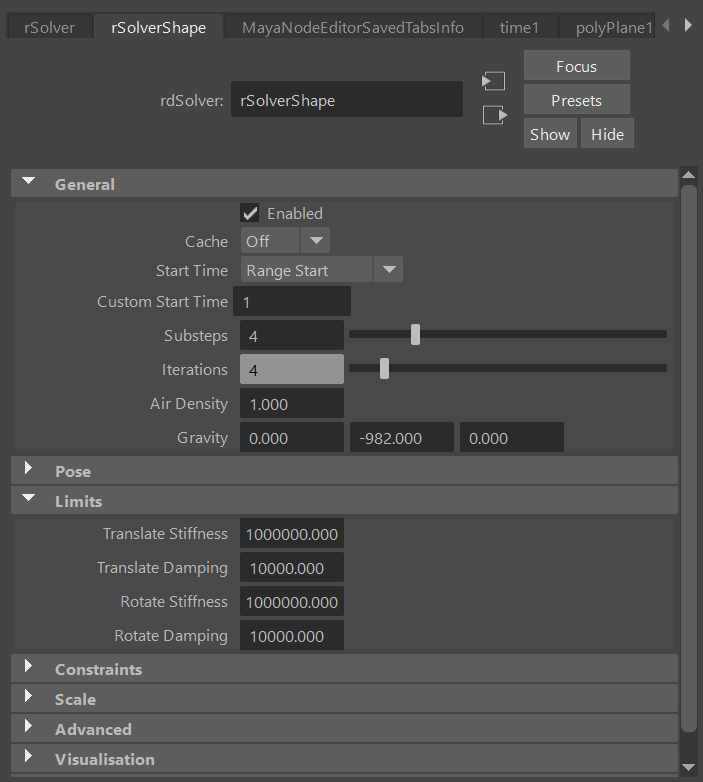
Global Damping
This, and other stiffness and damping-related attributes, can be controlled globally - for every limit in your scene - via the rSolver node.
Soft Limits
Sometimes, a limit is hard. Like your elbow. It won't allow you to continue rotating it once it's straightened out. You'll break it!
Other limits are more flexible. Let's reflect this in our simulation by reducing their range and lowering their Stiffness, accepting that they will exceed it, but get gently pushed back.
Accurate Feet
Feet contact with the ground is often more important than other contacts. For such cases, a box or capsule shape may not be enough.
So let's use Replace Mesh to fix that.
- Select
L_foot_jnt - Select a mesh
- Run
Replace Mesh
Animation
In most cases, you'll want some control over the resulting simulation. Just a little bit.
Group Markers
You could add/remove groups as you go for better control, each group multiplies stiffnesses and damping on each contained Marker.