2021.05.17
Highlight for this release is support for Floating Licences!
- ADDED Floating Licence Server Convenient big-studio licencing
- ADDED Mimic IK Turn mimic into a joint hierarchy, for IK and such
- IMPROVED Quality of Life More joy for you
- TIP Bulk Edits Some tips for a happier life
Floating Licence Server
So far, Ragdoll has been activated on a per-machine basis. It's been node-locked.
But in many cases, you are a studio with a team of artists using Ragdoll. That's when it becomes impractical for each artist to manage their own licences, or for licences to become associated with a single machine.
Floating licences solve this problem. With it, you register a fixed amount of licences with a server somewhere on your network, and then have Maya "lease" licences off of it. For example, with 10 floating licences, 10 artists can use Ragdoll in parallel. On Maya shutdown or plug-in unload, the lease is "dropped" meaning it can be picked up by another artist, on some other machine.
Heads-up SysAdmins
On Windows, the floating licence mechanism is currently a dedicated DLL.
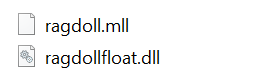
This will be merged into the plug-in like on Linux in a future release.
See also
Mimic IK
The Mimic introduced in the last release generated a clean hierarchy of transforms.
This release introduced "mimik", which is a joint hierarchy suitable for skinning and IK. It's got a proper Joint Orient too, irregardless of what the original animation controls looked like.
They're great if IK is what you want, but they do make the overall hierarchy more complex and introduce an additional jointOrient offset onto the joints themselves. For that reason, Transform is the default node type and is currently the most simple mimic to work with.
Room for Improvement
There's still room for improvement, the user attributes remain on the blue control nodes rather than the joints themselves for now. This will be addressed in a future release.
Quality of Life
More quality, less problems. Hacuna matata!
Constraint Outliner Style
You can now choose how constraints appear in the outliner.
| Style | Result |
|---|---|
nConstraint |
At the root of the outliner, as its own transform |
Maya Constraint |
As a child transform |
Ragdoll |
As a shape |
The rRigid node appears as a shape of any node you apply physics to, and normally constraints appear alongside them. But normal Maya constraints do not, and neither does the constraints you get with nCloth and nHair. So which do you prefer?
Ragdoll Style
As a shape, alongside the rRigid node.
Maya Constraint Style
As a child, similar to native Maya constraints.
nConstraint Style
As a new transform at the root of the scene, similar to nCloth and nHair constraints. Group them, hide them; if you can imagine it, you can achieve it!
Subjective
Whichever you prefer, it has no effect on the simulation and is strictly related to the Outliner only. They can also be re-parented after being created, it really doesn't matter where they are. So organise away!
Constraint Scale Rendering
The last release made constraints render poorly if the node they were parented to was scaled. The simulation was still fine, but you couldn't see what you were doing.
Before
After
Constraint Maintain Offset
Constraints typically maintain their offset on creation, such that rigids do not abruptly snap together on simulation start.
But it's optional, and if you don't maintain offset then they would snap together. With this release, the default behavior is now soft as opposed to infinitely strong.
Installer Improvements
On Windows, the MSI installer can now be used to install multiple versions of Ragdoll simultaneously, with a dedicated uninstall option each.
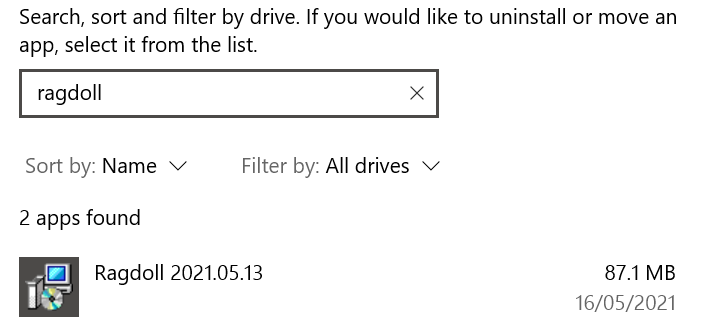
This should also help clear out issues with upgrading using the MSI, which has been problematic in the past since the installer really didn't like overwriting files.
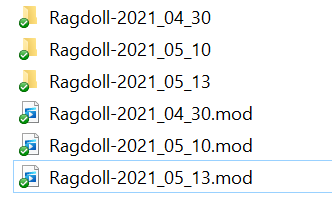
On all platforms, multiple Maya module files now co-exist, which means that if you want to disable or switch versions you can do that by removing the offending version - rather than editing the text file itself like in previous versions of Ragdoll.
Rigid Scale Rendering
Rendering of non-uniformly scaled rigid bodies has been improved and now respond interactively to scale changes. Notice in particular how scale is translated into sphere radius only along the X-axis. For non-uniform scale of a sphere, switch to Shape Type = Mesh.
Before
After
Scene Scale
The default distance unit in Maya is centimeters. Meaning Translate X=5.0 means "5 centimeters along the X axis". And in some cases, characters get modeled by this unit too, to an average height of 160-190cm.
But often this unit is ignored and now Ragdoll can too.
Default Value
Ragdoll has assumed a scene scale of 0.1 so far, meaning 10 centimeters meant 1 meter. That's the typical scale of most rigs, some having smaller - like the Fire Wolf at 0.01 - and some larger - like a real-world scale of 1.0.
This value used to be reflected in Gravity Y as 98.2 meaning 98.2 cm/s2. Which means that an object falling for 1 second would reach a velocity of 98.2 cm/s and keep increasing by the amount each second until reaching terminal velocity.
It is now reflected in Scene Scale instead as 0.1. For a real-world scale, simply set this value to 1.0 and leave gravity unchanged.

Quick Select
The quick-select commands now feature an option to ignore whatever is currently selected.
- Either select all of a certain type, like
rdRigid - Or filter current selection by type, like
rdRigid
Filtering grows more useful as your scenes grow large. When you have e.g. 2 characters and want to edit all constraints in one of them, then filtering is what you're looking for.
Bulk Edits
The Maya Channel Box is great for editing multiple nodes at once.
Select two or more nodes, change an attribute in the Channel Box, and the change is applied to each of the selected nodes at once. Win!
But what about attributes that aren't in the Channel Box?
Here are 3 ways in which you can bulk-edit a class of Ragdoll nodes in one-go. In each case, I'm using the Ragdoll -> Select menu item to bulk-select all rigid bodies in the scene.
1. Attribute Editor
Also known as "the slow way". Simply edit each attribute, one at a time. Like watching paint dry. It's slow.
2. Channel Editor
All attributes found in the Attribute Editor are also available in the Channel Editor. The most-commonly used ones are already exposed, but you can expose more.
3. Attribute Spreadsheet
For total control, irregardless of the Channel Box and with searchability amongst attributes, you can also try the lesser-known Attribute Spreadsheet.