2026.04.06 - Maya
You can now visualise part of what makes a performance realistic of your keyframed animations and simulations, the "center of mass".
- ADDED Hierarchical Center of Mass Pixels for things you previously had to imagine
- ADDED Faster Cluster 28x faster assignment, use with high-polycount assets, like buildings!
- ADDED Shadow Matte Less viewport clutter
- UPDATED Renderer Improvements Looks better, runs faster. What's not to like?
- FIXED Quality of Life Life, improved
Overview
You can now leverage the information provided to Ragdoll about your Maya characters - shapes, masses and hierarchy - to estimate a center of mass for it. Useful for visualising what makes your animations feel real.
Skip reading and jump straight to the new version here. Or follow along as I take you through what's new. 
Hierarchical Center of Mass
Every character now provides an option to display the combined center of mass.
A few options exists for how you want it visualised.
| Feature | Description |
|---|---|
Center of Mass |
That special point within each character, along with a helpful line drawn towards the ground. |
Trajectory |
Change in position over time, represented by a line |
Angular Momentum |
Change in rotation over time |
Linear Momentum |
Change in position over time, represented by an arrow |
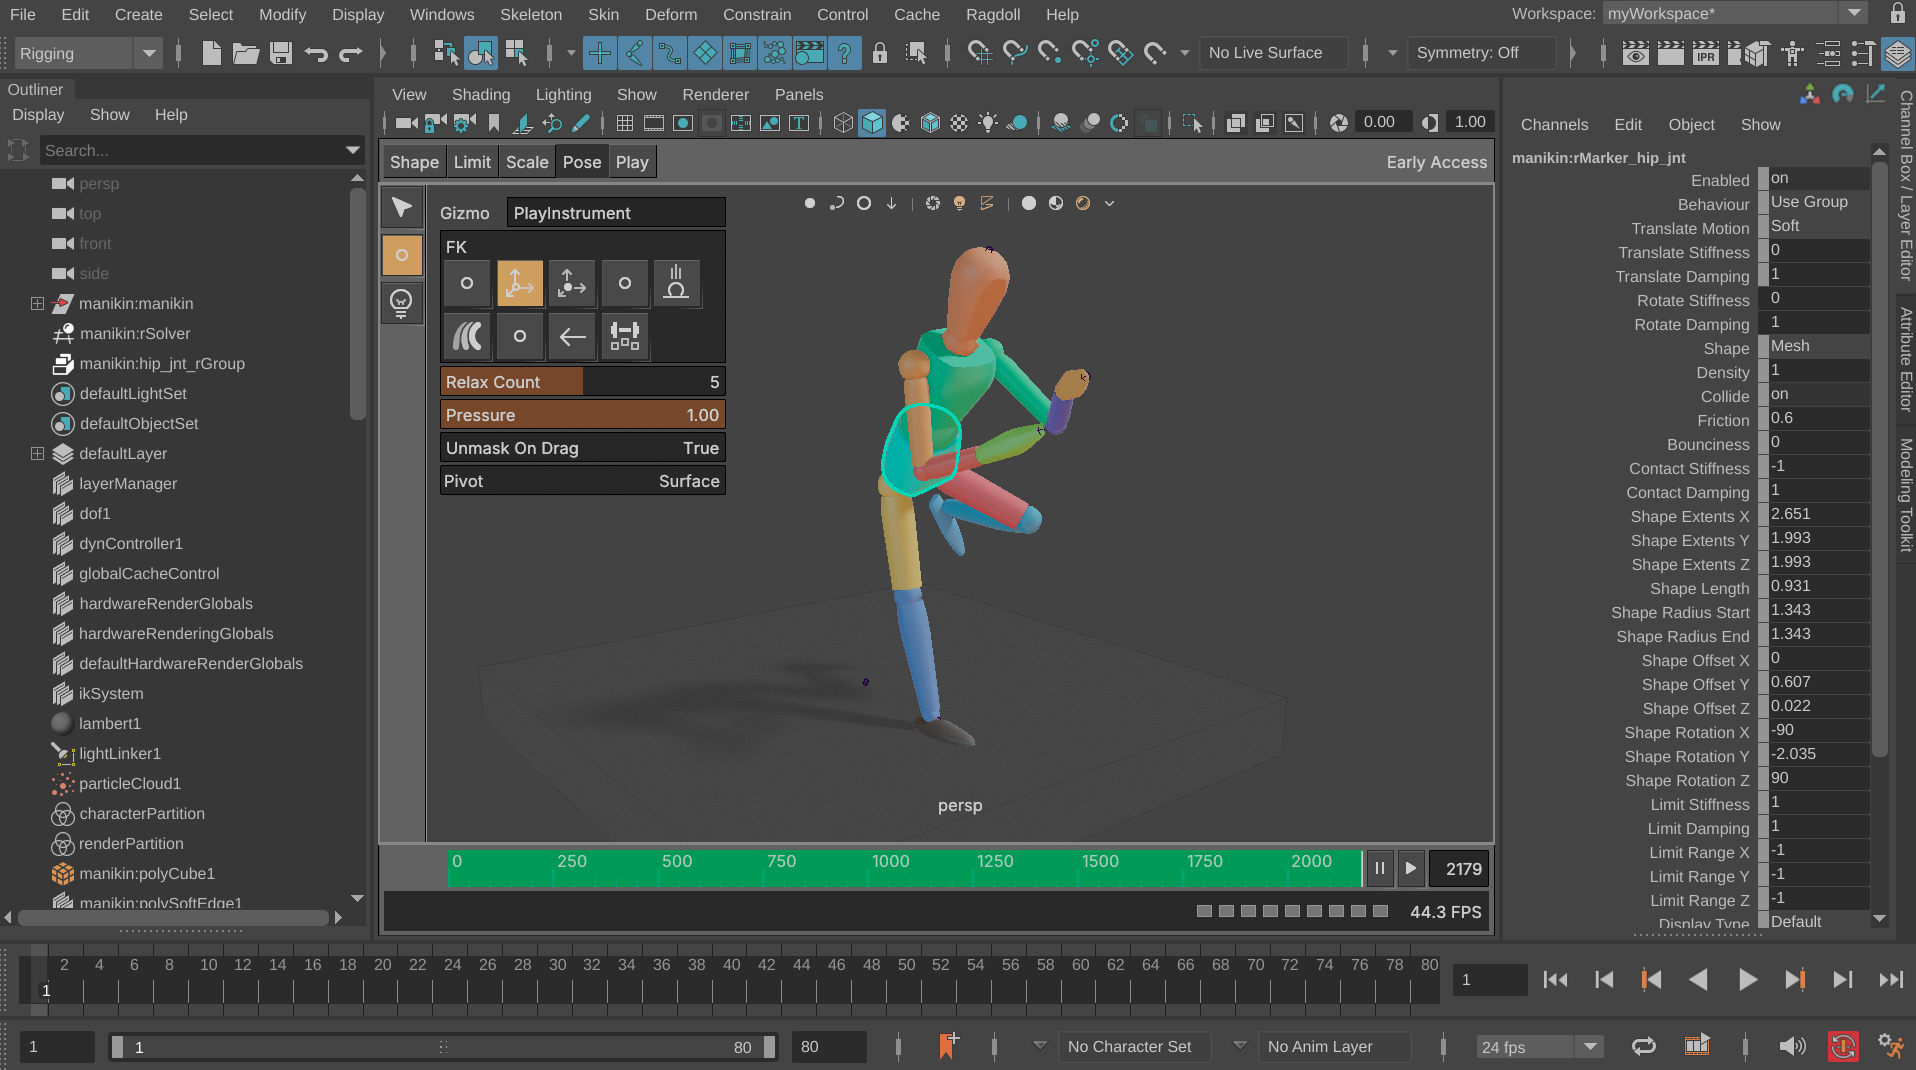
Center of Mass
The center of combined masses in your character.
Perhaps the most useful, this is the point at which your character should rotate when it isn't in contact with anything else.
It it also the point at which something must be supporting it from below, in order for it to maintain balance.
Notice how it moves as I rotate the legs. This is why virtually every "master control" or "COG" control in rigs today are inherently wrong.
Export COM
Stay on the lookout for future versions of Ragdoll, when this point can be exported and used for a pivot interactively as you animate. As it should be.
For the time being, use this as a visual guide. Any character mid-air should only rotate around this point, anything else is unrealistic. Impossible, basically.
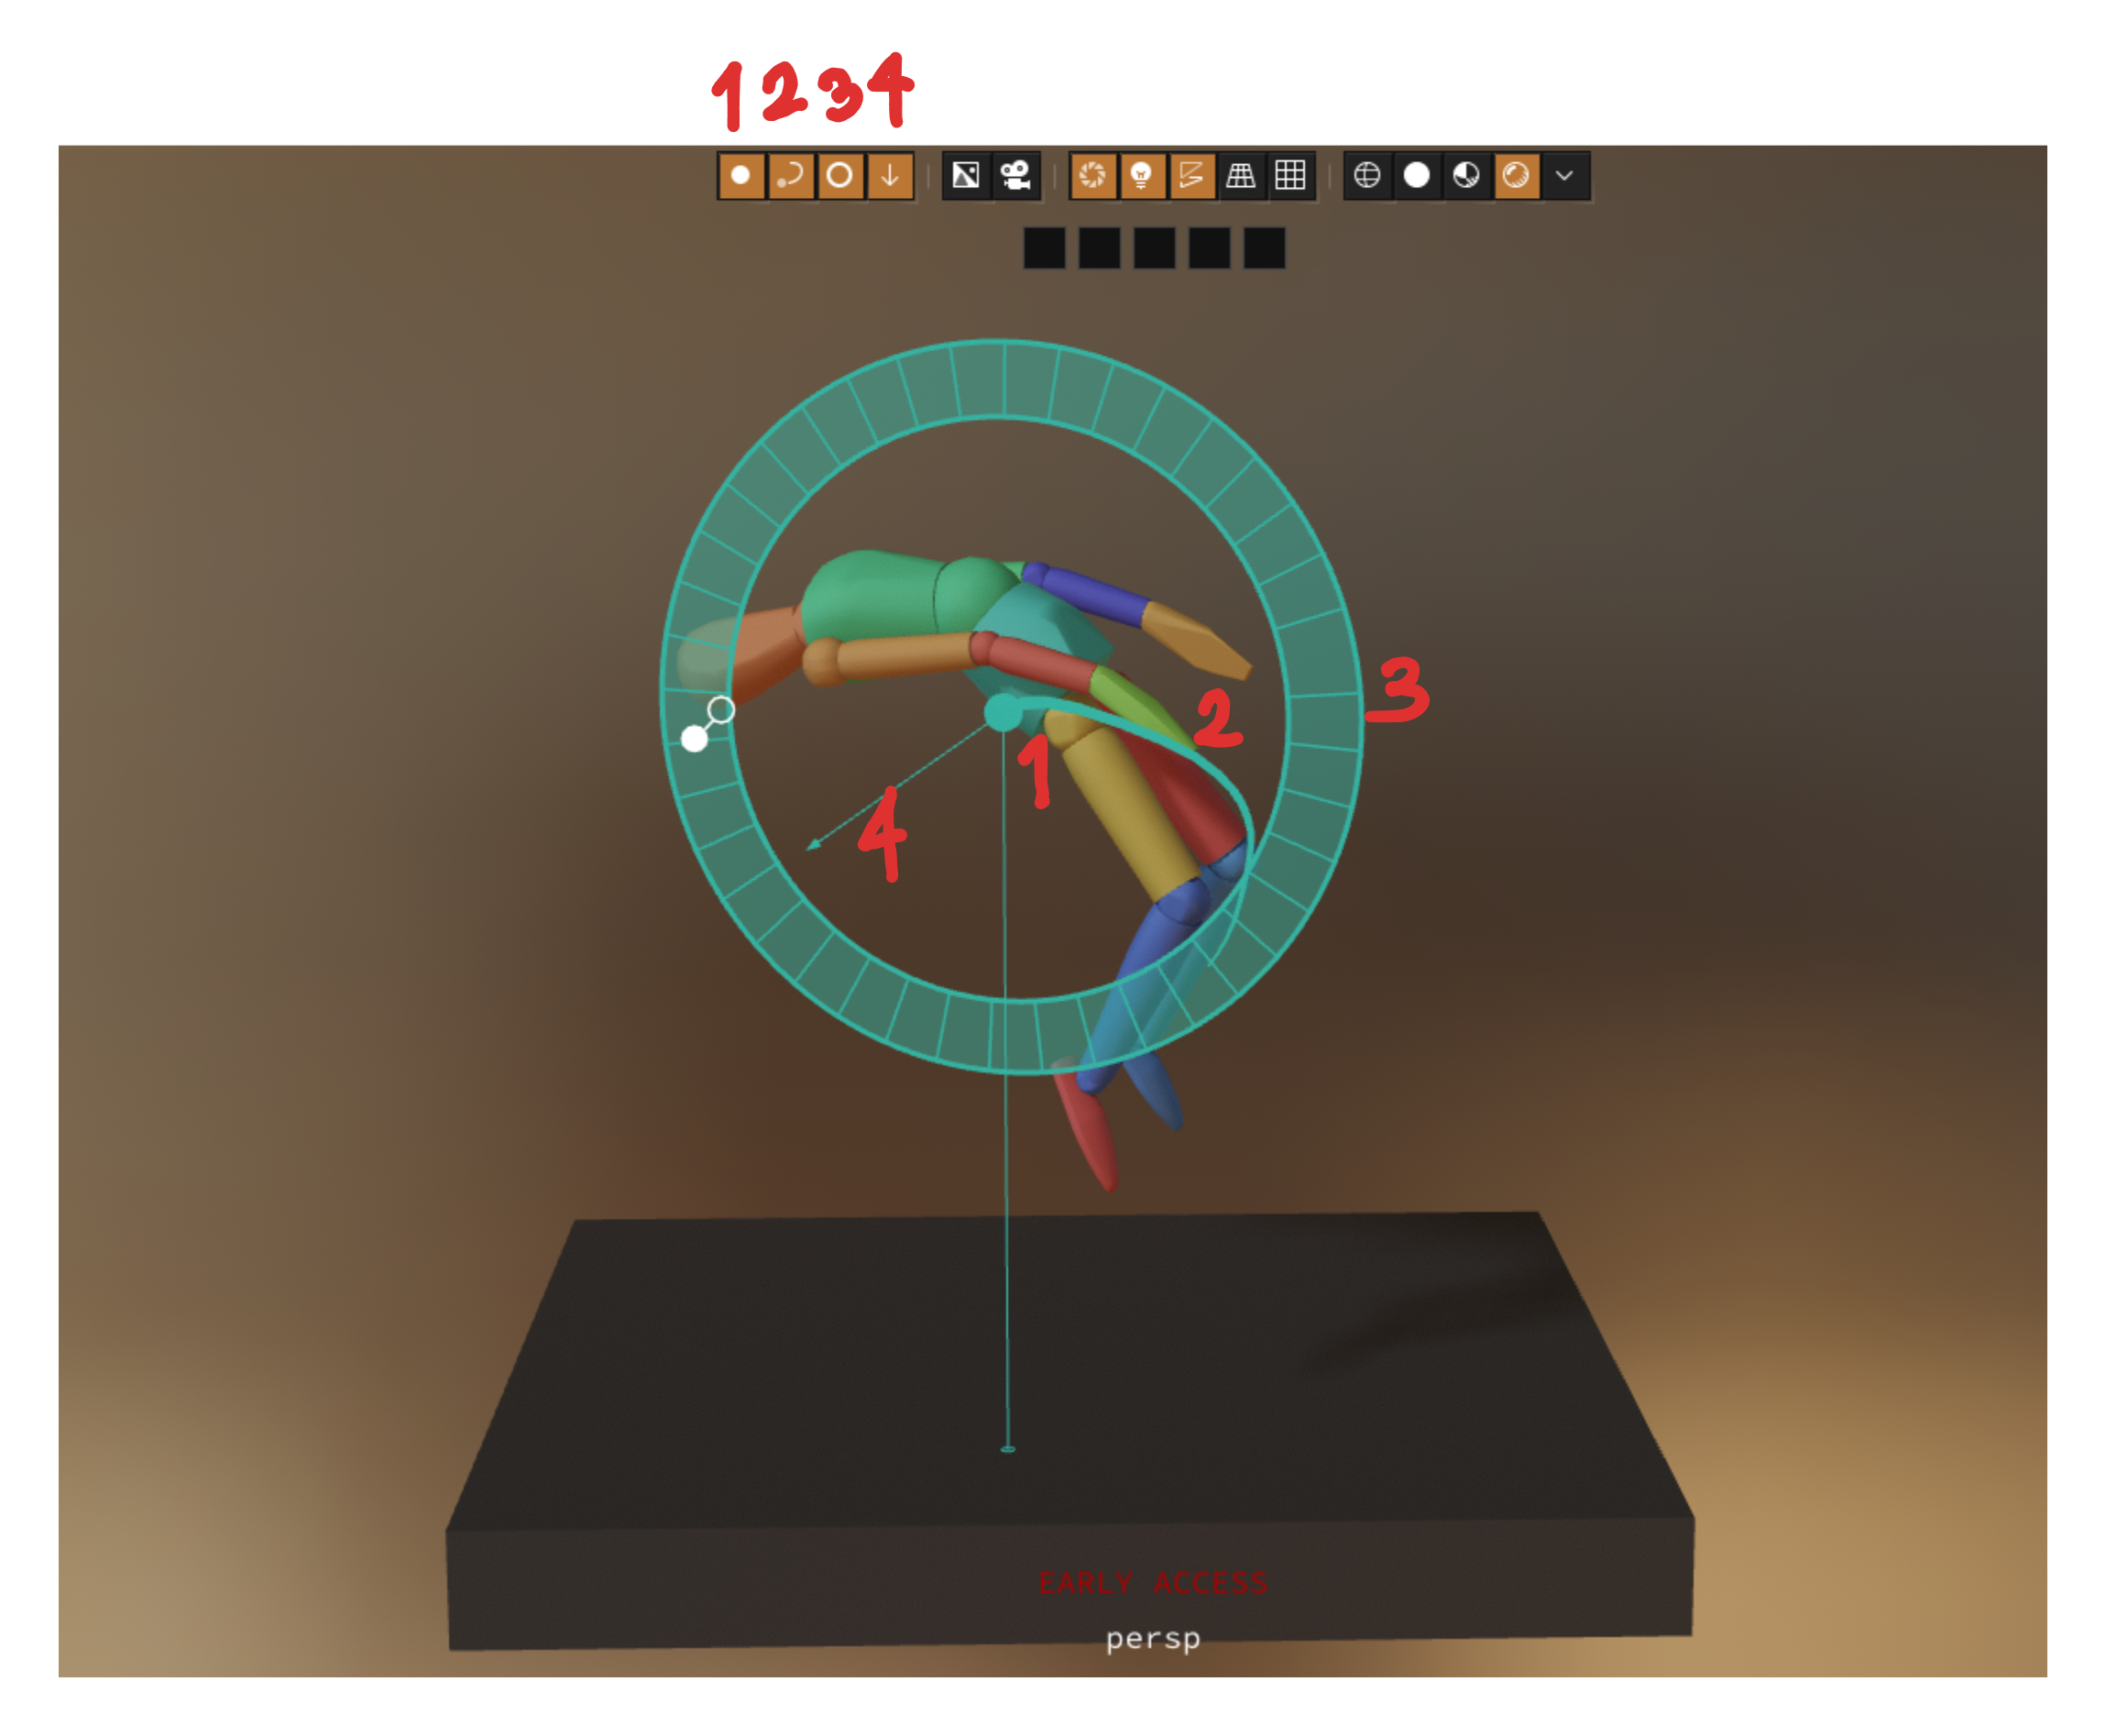
Rotation Acceleration
The change in overall rotation over time, also called "Angular Momentum".
Jargon
- Radius represents the amount of energy involved in spin
- Length and direction of arrow represents speed of spin
In the simplest case, with no external contacts (e.g. in space or under water), this circle should not change direction or size, without influence from external forces.
Take this unrealistic example.
Notice how in the above animation, the circle keeps changing direction. That is because the pivot around which it is spinning is not the center of mass, and thus the result is unrealistic.
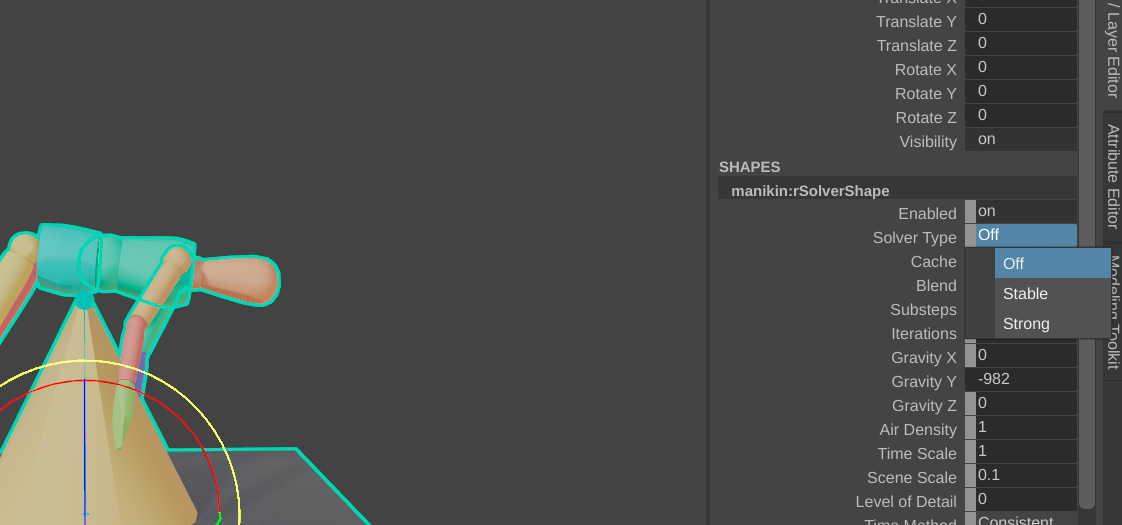
If we toggle simulation, we can see what it should look like.
Notice how it starts traveling at a constant speed, with no change in direction. The only way it can change direction is if some external force - including contacts - act on on it.
Now let's look at that first example again.
Notice how the circle increases in size as gravity keeps pulling the character towards the ground. Once it hits the edge, a sudden jump in size occurs due to the sudden contact.
Rotation Speed
You would be forgiven to thinking that momentum == speed.
But rotation acceleration is really rotation inertia. A kind of "mass" but for rotations. As a figure skater, you can tuck your arms in to spin faster, but it won't change your mass.
Instead, speed is represented as an arrow, pointing in the direction of spin.
5 frames of spin
The length of the arrow is 5 frames worth of spin. Meaning, in 5 frames time, the root of the arrow will reach the tip of the arrow.
Ballistics
A character taking flight, such as from a jump, follows a very special path. It is independent of anatomy or mass, or what the character is doing while in the air. It is always, always always always, a smooth curve drawn from your character's center of mass.
Flick the Trajectory button to display this path.
Notice how that once he's in the air and changes pose, the center of mass moves, but the trajectory remains smooth. Very subtle, but critical for a believable jump. Including characters under water or in space, without gravity and contact with the environment.
This curve is so special it has an entire field of research devoted to it, called "ballistics".
Reference Trajectory
Keep an eye out for future versions of Ragdoll, where it'll visualise the correct path. There is only one, and it is the only one that is correct. This will work both for your simulations (where it is guaranteed correct already) but also for your animations where it can help you find the correct path.
Position Acceleration
A line drawn from the center of mass. A longer line means more acceleration.
This is the overall change in position of the center of mass; the acceleration. In realistic animations, this should change smoothly unless affected by some external force, such as contacts with the environment.
Keyframe Animation
All of what you just saw works without simulation. Put into picture what bothers you about a performance, by monitoring the trajectory of the center, including how it accelerates both in position and orientation.
Use it, for example, to establish a balanced pose; that line drawn to the floor is where feet must support the weight of that center of mass in order to remain balanced.
Hybrid Renderer with MSAA
Juicier rendering, what's not to like?
Crisp Pixels
Pixels now conform to Maya's native pixels.
Before
Semi-smooth edges, despite Maya's anti-alias setting. It used to have a negative effect on Maya lines and geometry not rendered by Ragdoll. Because Ragdoll was post-processing not just its own render but the entire viewport.
After
Perfectly smooth edges with anti-aliasing, pixelated without. As you'd expect.
It's subtle, but also what you'd expect.
Backstory
As you embark on a new rendering engine, the first thing encounter for anything more complex than a spinning cube is the unnecessarily many pixels you need in order to achieve smooth edges, a technique called "MSAA".
It effectively renders at a higher resolution than what you see and scales down the image afterwards to achieve smooth edges. Simple, intuitive, but expensive.
So you incorporate another well-known technique called "FXAA", a post-processing effect that operates only on the pixels you see to achieve a kind of "fake MSAA". The savings are massive, but quality suffers. A lot.
Worst case you end up with something like this, where there is simply too much contrast for this algorithm to smooth out.

So the challenge was finding a way to achieve raytraced shadows in an image, whilst also rendering at a 2x, 4x or 8x resolution just to achieve those crisp edges.
Material Capture
You now have access to a library of materials for previewing your simulations!
Shadow Matte
Sometimes, Maya can disagree with Ragdoll about what should render on-top. The grid? The Marker? Why choose, when you can have both? Set Display Type: Shadow Matte to let shadows fall on-top of Maya's lines and geometry.
28x Faster Cluster
The previous release introduced the new rdCluster node, to simulate destruction. This release speeds up the assignment operation significantly, enabling you to achieve things like this!
Disabled Network Adapters
A long-running issue with node-locked licencing on Windows was the dreaded "Disabled Network Adapters" message.
This has now, finally, been fixed! 🥳
Next Up
We're closing in on a first release for Ragdoll running in the browser!