Manipulator
Interactively manipulate shapes and limits using the Manipulator.
Manipulator
One of the most challenging aspects of Ragdoll to date is editing shapes and limits. These have now been greatly simplified via the use of "manipulators", similar to your standard Translate/Rotate/Scale manipulators. Except on steroids.
Here's a 21 second overview.
Activate
You have a few options for activating the manipulator.
- Run
Ragdoll -> Manipulator - Select a Ragdoll node and press
Ton your keyboard - Select a Ragdoll node and click the
Show Manipulator Toolin the Toolbar
Any of the Ragdoll nodes can be selected in order to enable the manipulator via the T keyboard shortcut.
rdSolverrdGrouprdMarkerrdDistanceConstraintrdPinConstraintrdFixedConstraint
Manipulator UI Scale
If the Manipulator's UI is too big or too small, you can change that via Ragdoll > System > Ragdoll Preferences > Resolution Scale. Make sure to restart Maya or reload Ragdoll after changing the Resolution Scale.
Solver Shape
At the time of this writing, the solver needs its shape selected, not the parent transform. This will be addressed in a future release.
A comfortable workflow is..
- Select any assigned control
- Select the marker DG node in the Channel Box
- Press
T
The selected Marker will be pre-selected in the manipulator.
Alternatively, press the Show Manipulator Tool button in the Toolbar.
Shape Modes
This release introduces a manipulator with two "modes".
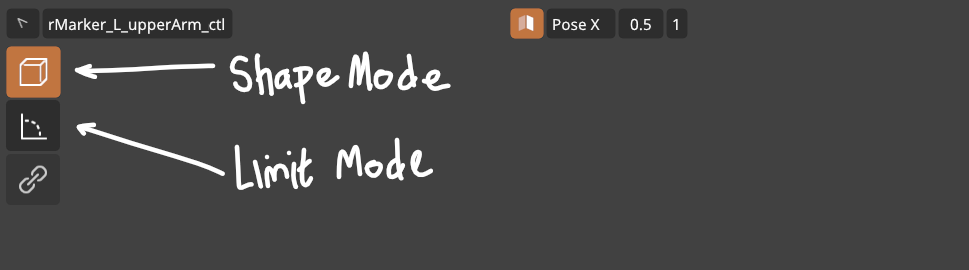
| Mode | Description |
|---|---|
| Shape Mode | Edit shape properties, like Length, Radius, Position and Orientation |
| Limit Mode | Edit limit properties, like Twist and Swing along with their pivots. |
In Shape Mode, you currently have 5 manipulators.
| Manipulator | Description |
|---|---|
Translate |
Affects the Shape Offset attribute |
Rotate |
Affects the Shape Rotation attribute |
Scale |
Affects the Shape Radius and Shape Extents attributes |
Length |
Affects the Shape Length attribute, for the Capsule shape |
HUD |
Individual control over primary attributes, like Shape Extents axes |
Translate
Hold the middle-mouse button to translate.
Rotate
Hold Ctrl + middle-mouse button to rotate.
Scale
Hold Ctrl + left-mouse button to scale.
Length
The Capsule shape have additional in-view manipulators you can drag to affect each side independently.
HUD
Finally, attributes without a visual handle can be edited via the viewport HUD.
Limit Mode
In Limit Mode, you currently have 2 manipulators.
| Manipulator | Description |
|---|---|
Limit |
Affects the Limit Range XYZ attributes |
HUD |
For locking and enabling of limits |
Enable and Disable
Click the Axis button to limit the rotation about a particular axis.
Lock and Unlock
Click the Lock button to prevent all rotation about the axis.
Asymmetrical Edits
Hold
Ctrlto make asymmetrical edits
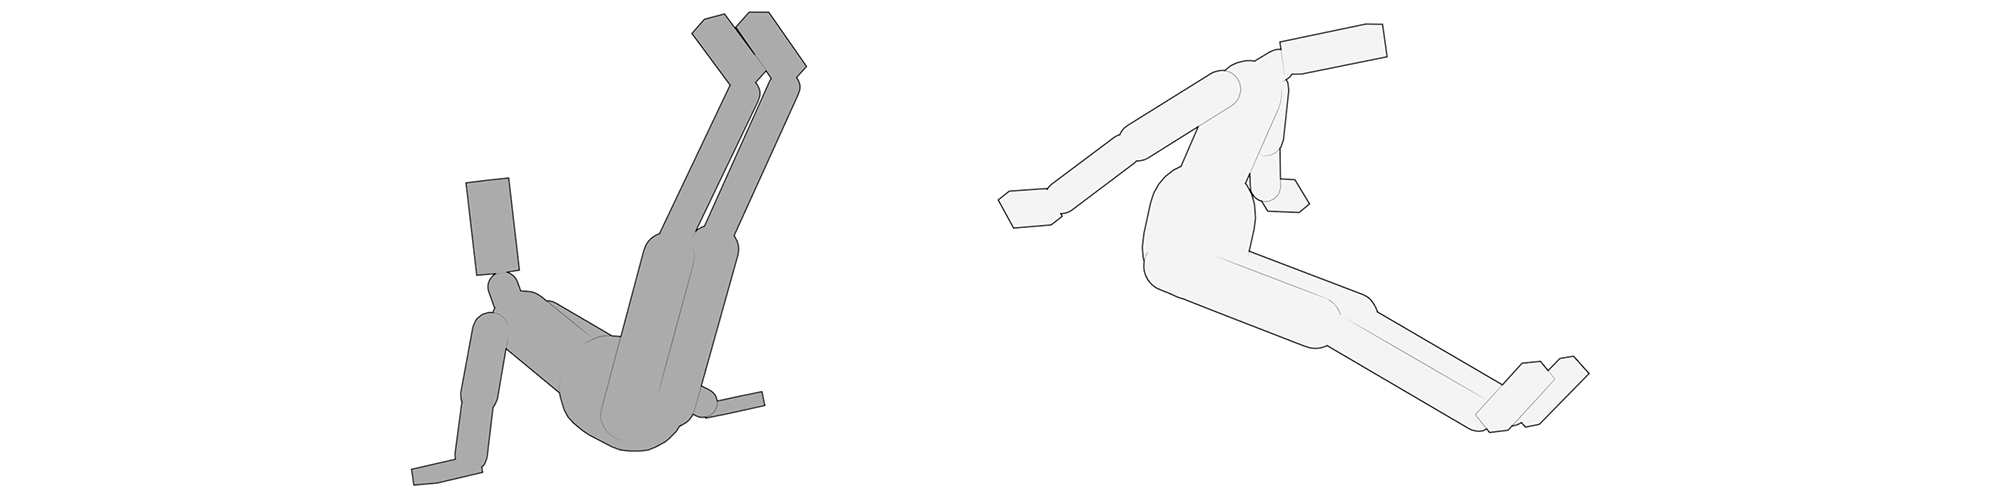
Some limbs start out at the center of their limit. Like your hip and neck. They are typically modeled to enable equal movement in each axis.
Other limbs, like the elbow and knee, are typically modeled in the extreme of their limit. Able to only rotate in one direction. For these cases, they need an asymmetrical limit.
With limits in multiple axes, keep an eye out for how asymmetrical edits to one axis affect the others.
Why are they moving?
Under the hood, each axis must still be symmetrical; edits only appear to be asymmetrical for your convenience. What's really happening is the entire limit is both changing shape and also rotating and the rotation is causing all axes to move.
This is an inherent limitation (pun!) of limits in Ragdoll and is unlikely to be addressed in the future, so we'll have to work with it.
If you mess up and want to start from scratch, hit the Reset button, also found under..
Ragdoll -> Utilities -> Reset Constraint Frames
Symmetry
Enabled per default, symmetry will mirror your edits across an axis.
There are 2 types of symmetry at the time of this writing.
| Type | Description |
|---|---|
World |
Look for a marker across the current axis in worldspace |
Pose |
Based on the pose at the time of assigning markers, which is typically symmetrical. |
Each of which can be made symmetrical in either the X, Y or Z axes. The Pose axis means you can make changes even if a character has been posed after having been assigned. A feature particularly useful when assigning to the A- or T-pose of a character rig.
Pose Based Symmetry
Because these controls were assigned in the T-pose of the rig, you can use Pose-based symmetry to make changes even when the character is currently asymmetrical.
Multiple Rigs
If two or more characters are present in the scene, and they were all rigged in the same pose, at the center of the world, then Ragdoll will only look at markers in the same rdGroup as the selected Marker.
Search Distance
On the right-hand side of the Enable Symmetry button, there is a Search Distance gizmo.
Drag to edit this value
When you select a marker on one side, it will search for a marker at the opposite side of the axis you've chosen. Because positions are all approximate, it uses a maximum search distance to look for it.
Matches
Ideally, there should only be one match. But in a crowded hierarchy there may be several. Tune the Search Distance to control the number of matches, to ensure it doesn't pick the wrong one.
Multi-select
Disable
Symmetryto enable multi-select
Hold Shift to select and manipulate multiple markers at once.
Drag Select?
Not yet! But will be added in a future release.
Undo & Redo
No surprises here.
Changes made using the manipulator are undoable as you would expect, with the exception that it currently does not let you undo the selection itself like normal Maya selection does; this will be addressed in a future release.
Fit-to-view
Tap the F key to fit any selected Marker(s) to the view, like you would expect from selected Maya nodes.
Caveat
This currently only applies if you've activated the manipulator using the Ragdoll -> Manipulator menu item, or have the rdSolver shape node selected.
Select Node
Click the
Select Nodebutton to select this node in Maya
Per default, Ragdoll and Maya selection are separate. You can have Maya select the node(s) currently seleted in Ragdoll by pressing the Select Node button.
You can automate this using the Synchronise button at the far-left of the HUD.
Why is this not on per default?
The solver is what is actually being fitted. If the selection is changed to a marker (which is not a DAG node, and therefore lacks a visual representation) then fit-to-view no longer works.
This will be addressed in a future release and made into the default.
With Multi-select or symmetry enabled, all selected markers will be selected in Maya, to make bulk edits via the Channel Box easier.
Manipulator Help
On the right-hand side is an overview of the hotkeys and mouse button combinations you can use, and what they do.
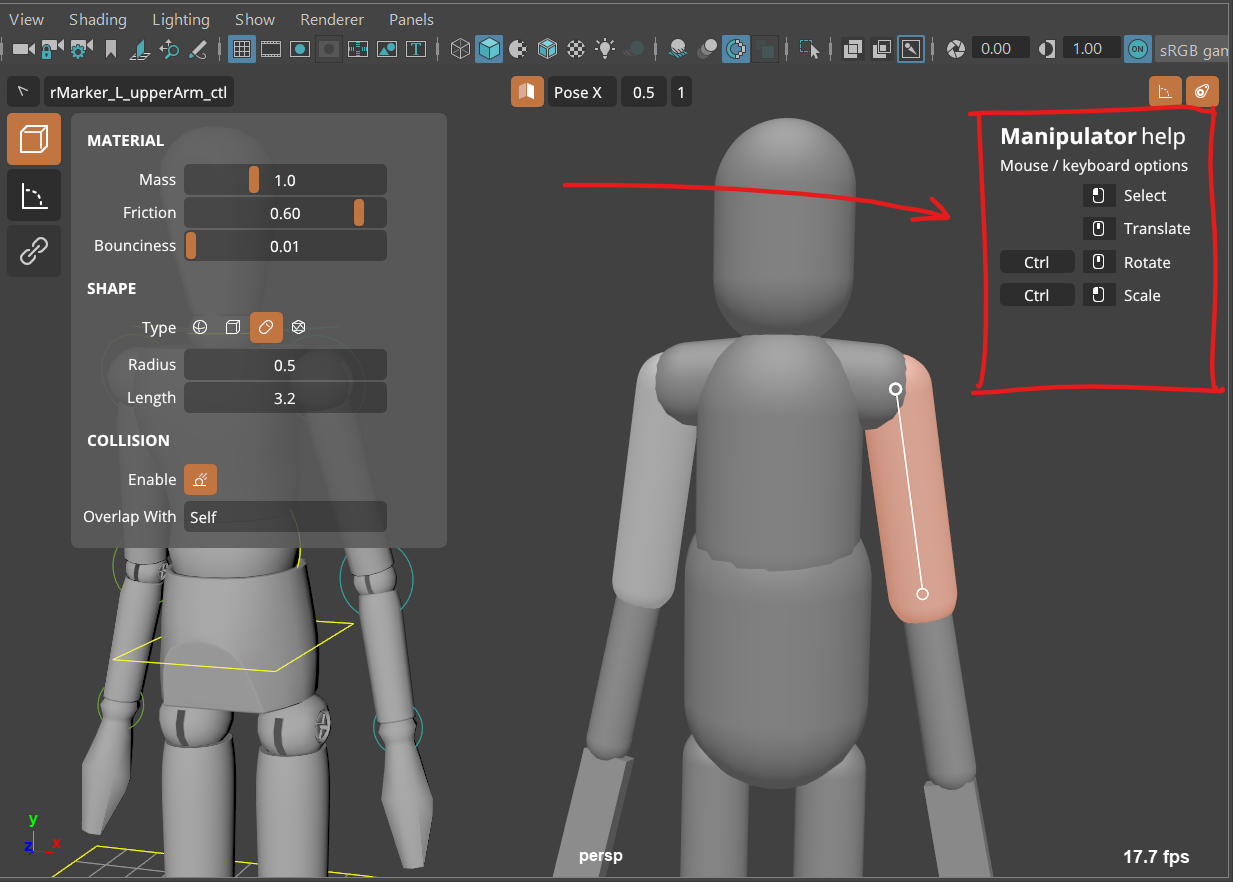
It can be hidden via the HUD button on the upper right-hand side.